Springtime is here, and with it comes a craving for all things bright and cheerful! There’s something about the warm, sunny hue of butter yellow that lifts the spirits and adds a touch of joy to any look. As we dive into the world of nail fashion, I’ve been obsessing over butter yellow manicures. They are chic, fashionable, and universally appealing, making them the perfect choice for almost any occasion. Whether you’re heading to a wedding, brunch with friends, or simply want to brighten up your day, a butter yellow manicure is a delightful option.
If you’re someone who loves to experiment with nail art and style, this post is crafted just for you. It’s packed with 17 stunning butter yellow manicure ideas that cater to every personality and event. From classic designs to more adventurous options, you’ll find inspiration that matches your vibe. With these ideas, you can express your creativity while embracing the vibrant charm of butter yellow.
In this blog post, you’ll discover a variety of manicure styles that are not only trendy but also easy to replicate. We’re talking about everything from the subtle elegance of a classic butter yellow to the striking flair of neon combinations. You’ll find your next favorite nail design and learn how to achieve a look that turns heads. So, let’s dive into these fabulous butter yellow manicure ideas and get inspired!
Key Takeaways
– Butter yellow manicures are a versatile choice that works for various occasions, adding a cheerful touch to your look.
– The blog presents 17 unique designs, from classic styles to creative patterns, catering to different tastes and personalities.
– Each idea offers practical tips on how to achieve the nail art, making it easy for you to replicate at home or share with your nail technician.
– The article emphasizes the fashionable nature of butter yellow while highlighting its ability to uplift your mood.
– You’ll walk away with the confidence to try new styles, ensuring your nails are always in vogue and perfectly polished.
1. Classic Butter Yellow
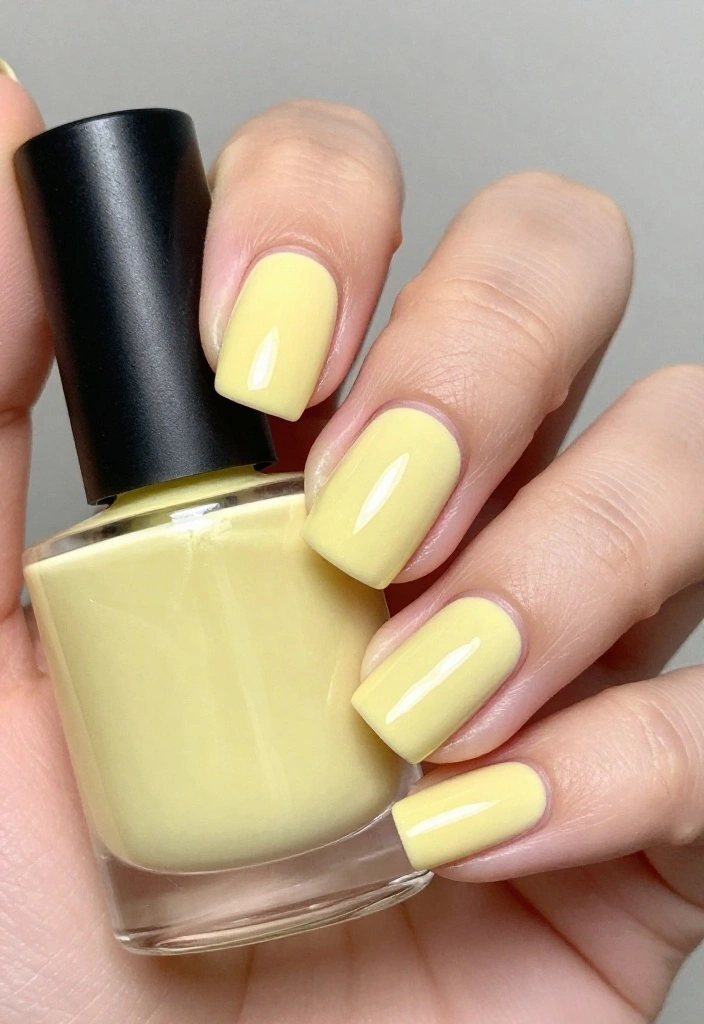
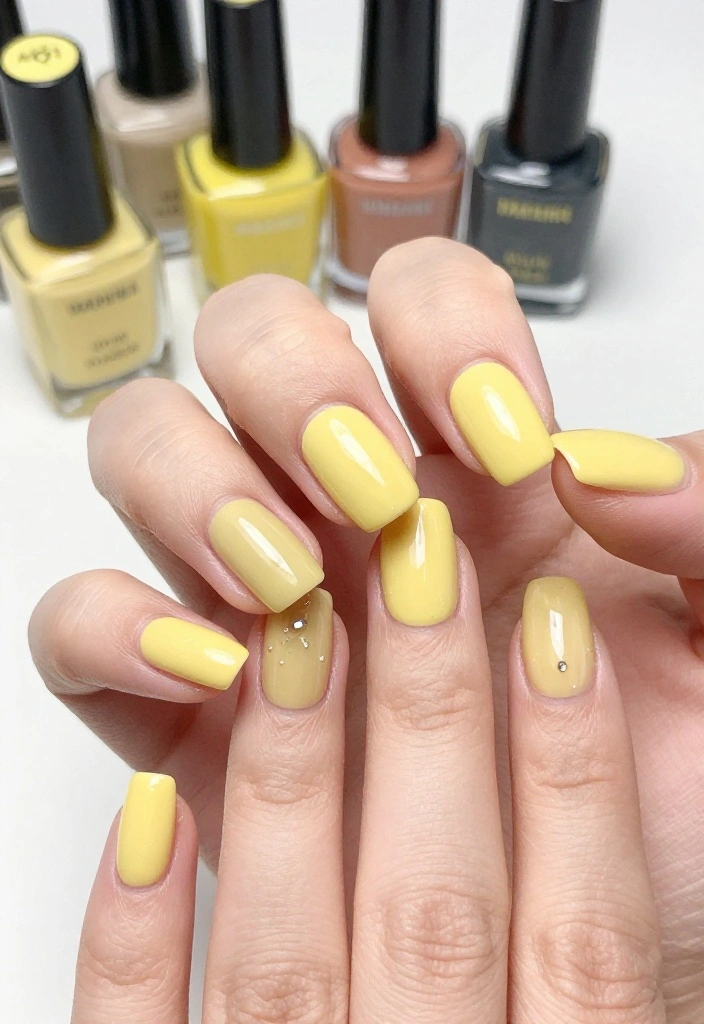
A butter yellow manicure is a timeless choice that radiates freshness and charm. This lovely shade is perfect for adding a touch of brightness to your look, whether you’re at work or enjoying a weekend outing. Its versatility allows you to wear it solo for a clean finish or enhance it with understated accessories for added elegance.
To achieve this chic style, grab a quality butter yellow nail polish. Begin with a protective base coat, then layer on two coats of the butter yellow polish for smooth, even coverage. Complete your look with a glossy top coat for that eye-catching shine!
Opt for a matte finish for a modern twist or add a few glittery accent nails for a dash of glam.
– Butter yellow nail polish
– Base coat
– Top coat
1. Clean and shape your nails to your desired length.
2. Apply the base coat and allow it to dry.
3. Paint two coats of butter yellow polish, ensuring each coat dries thoroughly.
4. Seal it all in with a glossy top coat.
5. Enjoy your stylish and timeless manicure!
2. Floral Accents
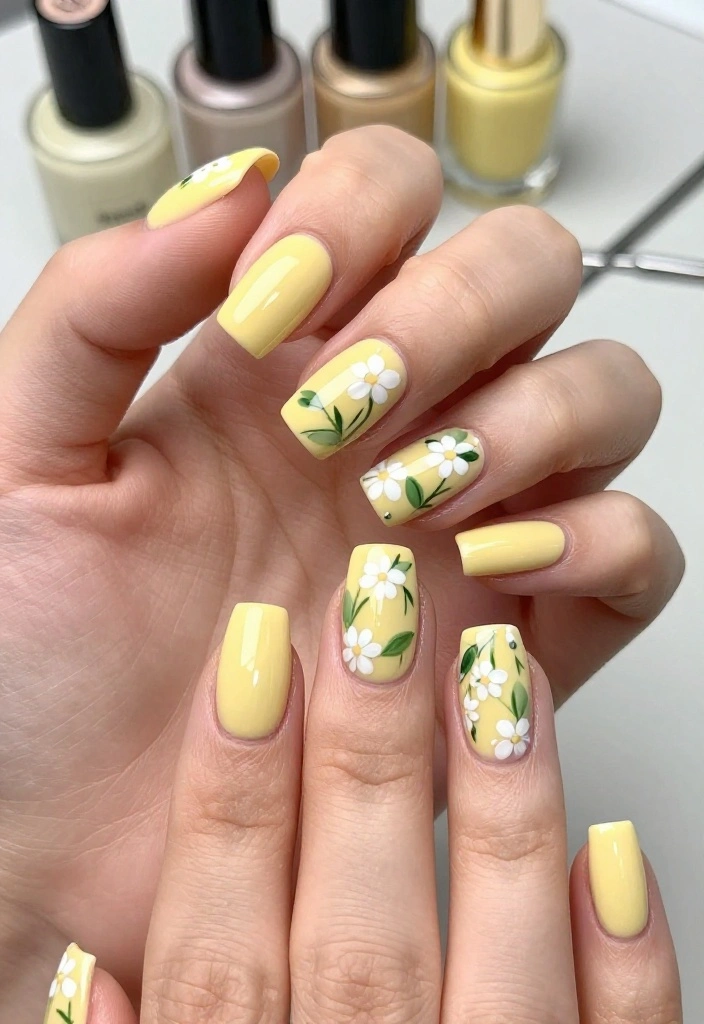
Add a romantic touch to your butter yellow nails with delightful floral accents. This design embodies a whimsical spirit, making it ideal for spring and summer celebrations. Picture a sunny butter yellow background adorned with hand-painted or sticker flowers, creating a vibrant garden right on your fingertips.
Start by applying your butter yellow base coat. After it dries, use a fine nail brush or dotting tool to create beautiful flower designs. Choose contrasting shades like white or soft pastels for the blooms, and don’t forget to add tiny green leaves for a natural look.
Keep the floral designs simple for a minimalist effect or opt for intricate patterns for a bolder statement.
– Butter yellow nail polish
– White and green nail polish for flowers
– Base coat
– Top coat
1. Apply the base coat, followed by two coats of butter yellow polish.
2. Once dry, create floral designs using a fine brush.
3. Add a top coat to protect your lovely floral creations.
4. Show off your whimsical nails at your next gathering!
Floral Accents
Editor’s Choice




3. Geometric Patterns
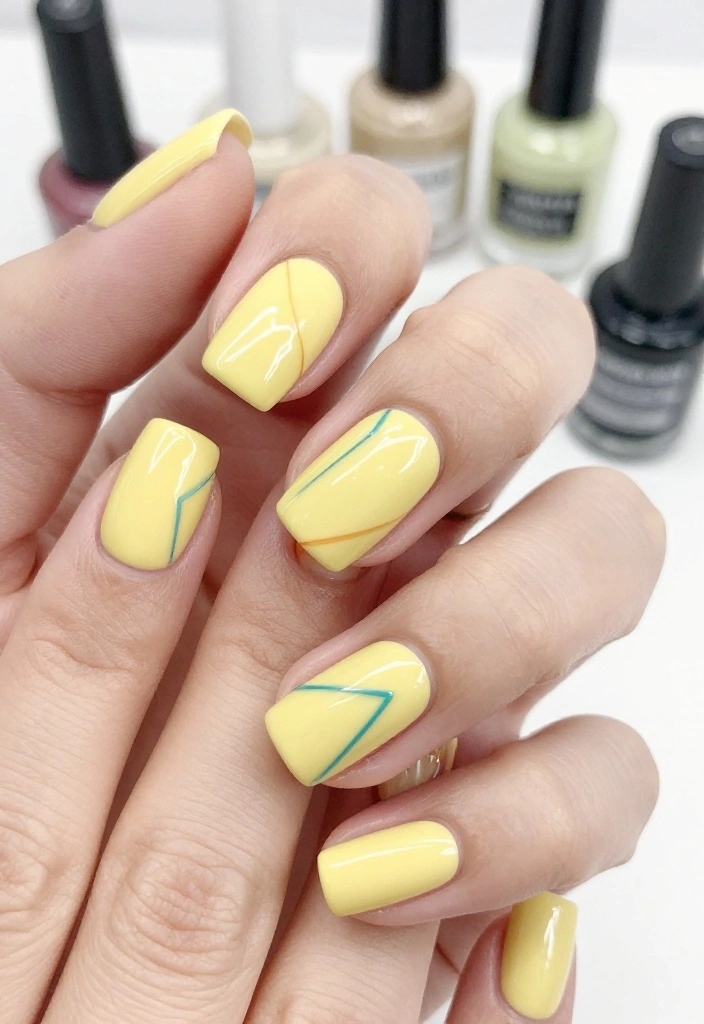
Geometric patterns are a fun way to showcase your butter yellow manicure with a creative twist. This style allows for artistic expression, adapting to match your outfit or mood. With lines, triangles, and abstract designs, your nails can become a canvas for your imagination.
Begin with a solid butter yellow base. Once it’s dry, use striping tape or a fine brush to create your desired geometric shapes. Incorporating contrasting colors like white, black, or metallics will elevate your design and make it eye-catching for any occasion.
Experiment with various shapes and sizes to create a unique look that reflects your personality.
– Butter yellow nail polish
– Striping tape or fine brush
– Additional colors for geometric designs
– Base coat
– Top coat
1. Prepare your nails with a base coat, then apply butter yellow polish.
2. After it dries, use striping tape to create geometric shapes.
3. Fill in the shapes with contrasting nail polish.
4. Finish with a top coat to secure your artistic design.
4. Ombre Effect
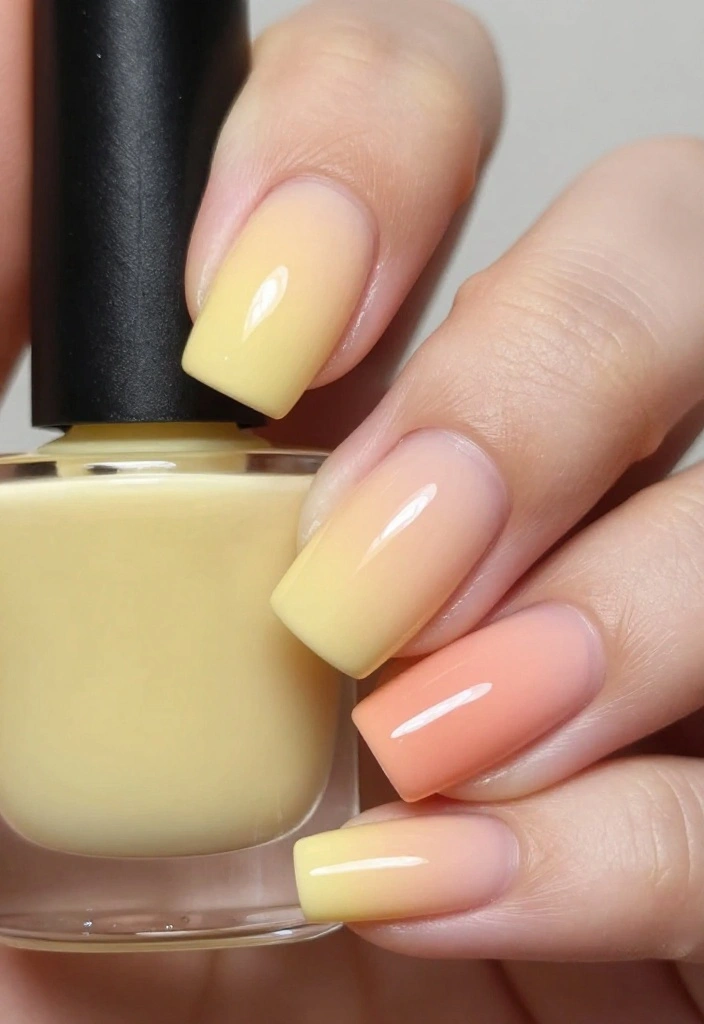
The ombre effect is a stunning way to blend butter yellow with other shades for a stylish gradient. This look can be subtle for daytime wear or bold for evening outings, making it versatile for various occasions. The seamless fade of colors creates an eye-catching and modern finish.
To create this effect, use a makeup sponge to blend butter yellow with a complementary shade, like white or peach. Start with a base coat and allow it to dry completely before applying the ombre gradient. Dabbing the sponge on your nails will yield a beautiful, blended transition.
Experiment with different color combinations to discover fresh takes on this classic ombre look.
– Butter yellow nail polish
– Additional color of choice (white, peach, etc.)
– Base coat
– Top coat
– Makeup sponge
1. Clean your nails and apply a base coat.
2. Once dry, paint your nails with butter yellow polish.
3. Use a makeup sponge to dab the additional color at the tips and blend it into the butter yellow.
4. Seal your design with a top coat.
Ombre Effect
Editor’s Choice


5. Glitter Glam
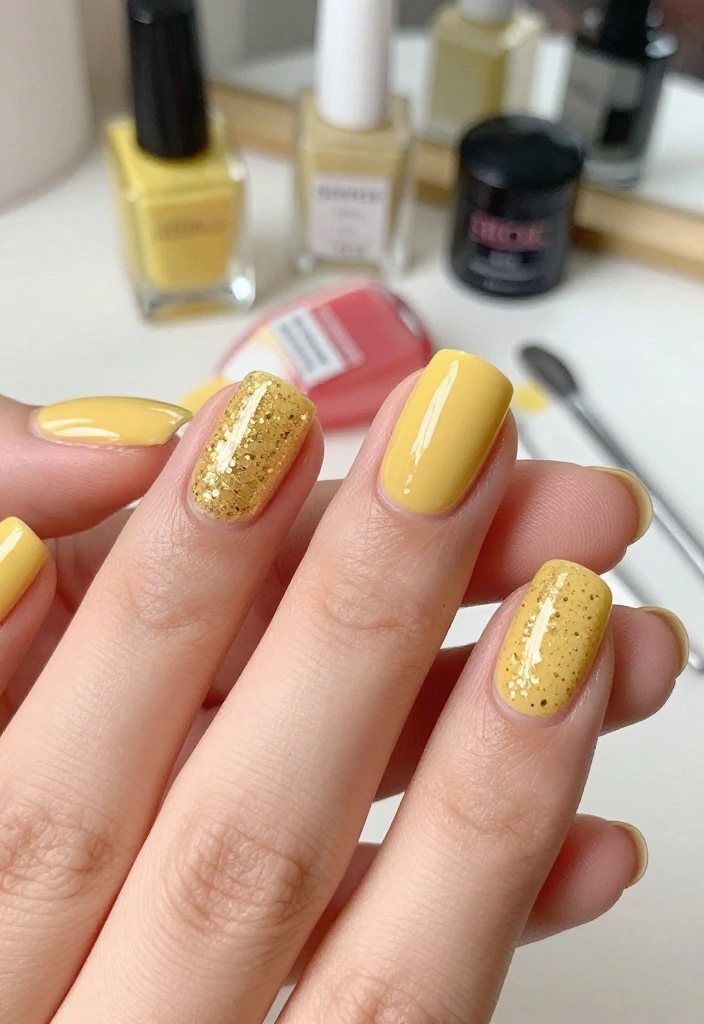
If you love a touch of sparkle, a butter yellow manicure paired with glitter accents is the way to go! This glamorous look is festive and perfect for parties or special celebrations. The soft yellow base mixed with shimmering glitter adds a fun and chic twist to your nails.
Start with your butter yellow polish, and once it’s dry, apply a layer of glitter polish over the top or on specific accent nails. For a textured effect, dab loose glitter onto wet polish for extra dazzle!
Mix different sizes of glitter to create depth and interest in your design.
– Butter yellow nail polish
– Glitter nail polish
– Base coat
– Top coat
1. Prep your nails with a base coat, then apply butter yellow polish.
2. Allow the polish to dry completely.
3. Apply glitter polish or dab loose glitter onto accent nails.
4. Finish with a top coat to lock in the sparkle.
Fun fact: butter yellow nails with glitter sparkle in 3 ways—the pale base, the shimmering overlay, and tiny textured accents. It’s a quick 2-step glam upgrade that instantly reads festive. Perfect for parties and celebrations, your nails will glow in photos.
Glitter Glam
Editor’s Choice


6. Butterfly Nail Art
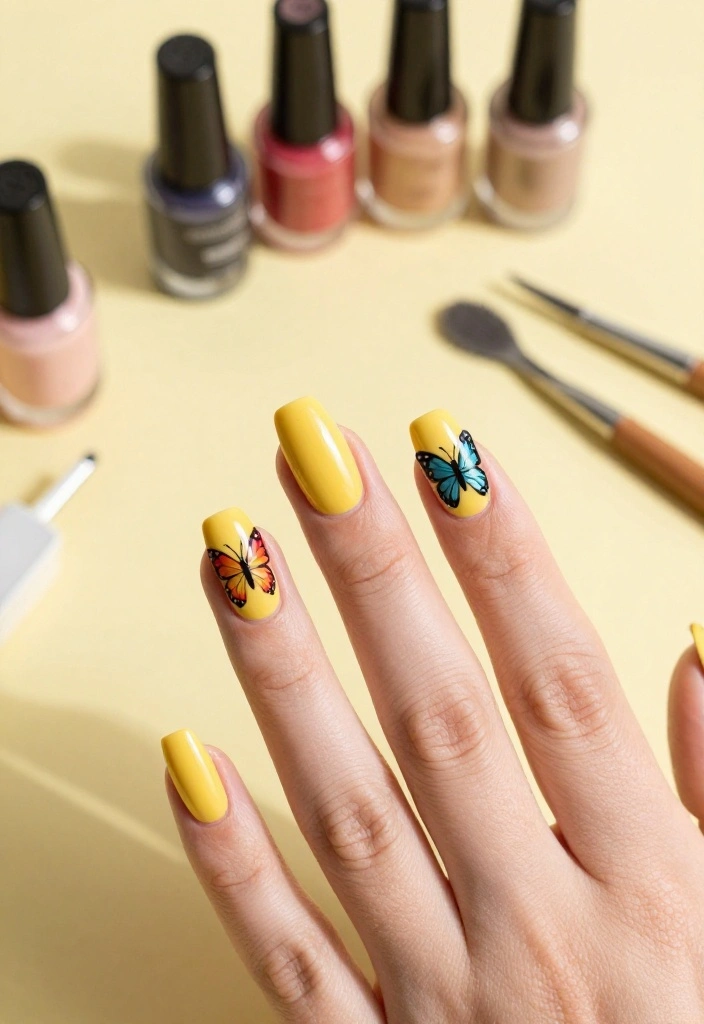
Butterfly nail art adds a whimsical flair to your butter yellow manicure, making it perfect for spring and summer. This charming design captures the delicate beauty of butterflies, either painting them on a few accent nails or creating a full butterfly garden effect across all your nails.
Start with a butter yellow base coat. Once it’s dry, use a thin brush or nail stickers to add colorful butterflies. Choose vibrant hues like pinks, blues, and greens to contrast beautifully against the sunny yellow background.
Mix in some tiny flowers alongside the butterflies for a delightful garden touch.
– Butter yellow nail polish
– Various colors for butterfly designs
– Base coat
– Top coat
1. Clean and shape your nails, then apply a base coat.
2. After it dries, paint with butter yellow polish.
3. Once the yellow is dry, paint or stick butterfly designs onto the nails.
4. Seal with a top coat.
📹 Related Video: How to do viral butterfly nail art!
7. Minimalist Lines
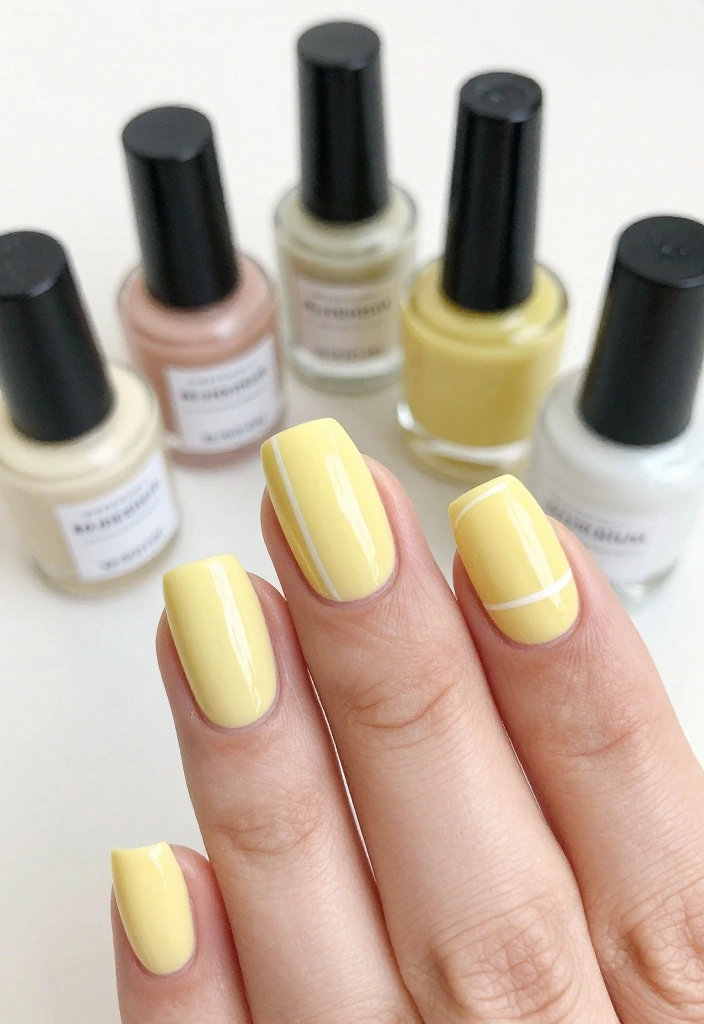
For those who appreciate simplicity, the minimalist lines design is a perfect choice. This butter yellow manicure features clean lines and subtle accents, making it ideal for professional settings or anyone who loves an understated look. It’s chic and allows the butter yellow to shine without overwhelming your style.
Start with the butter yellow base coat and let it dry completely. Use a fine brush or nail striping tape to create sleek lines across your nails. You can go for diagonal stripes, vertical lines, or a mix of both for a modern edge.
Pair this design with a matte top coat for an edgy finish that stands out.
– Butter yellow nail polish
– Base coat
– Striping tape or fine brush
– Top coat
1. Prepare your nails with a base coat, then apply two coats of butter yellow polish.
2. Allow it to dry before using striping tape or a fine brush to create your desired lines.
3. Finish with a top coat for added shine.
You might also like
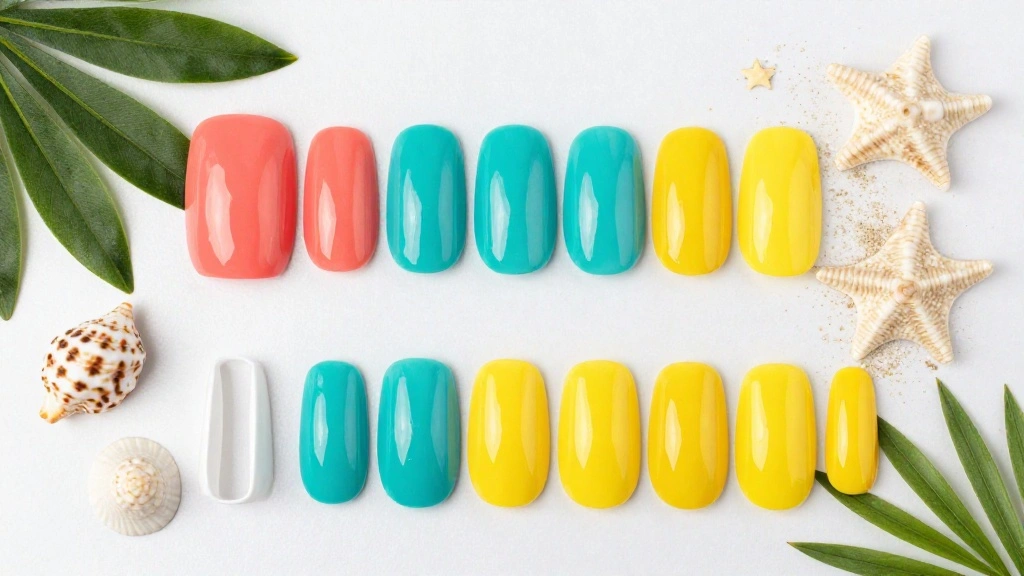
How To Choose the Right Butter Yellow Manicure
Choosing the perfect butter yellow manicure can transform your style for any occasion. With so many options available, it’s essential to know what to consider before making a decision. Here’s how you can choose the right butter yellow manicure for you:
1. Nail Shape
The first step is to decide on your nail shape. Different shapes can affect how the color looks on your nails. Popular shapes include square, round, almond, and stiletto. Each shape brings a different vibe to your overall look. For example, almond-shaped nails may give off a more elegant feel, while square nails are chic and modern.
2. Occasion
Think about where you’ll be wearing this manicure. Is it for a casual outing, a wedding, or a work meeting? A classic butter yellow might be perfect for a casual day, while a glitter glam or floral accent is great for special events. Matching your manicure to the occasion ensures you feel confident and stylish.
3. Nail Art Style
Consider what type of nail art you want. Do you prefer something simple, like minimalist lines, or are you leaning towards something bold, like geometric patterns? Nail art can enhance the butter yellow color and add a unique twist. If you’re unsure, start with a basic butter yellow and add accents later!
4. Finish Type
The finish of your nail polish matters too! You can choose a glossy, matte, or even textured finish. A glossy finish will give a shiny look, while a matte finish can look chic and modern. If you want something unique, consider textured options, which can add depth to your butter yellow manicure.
5. Personal Preference
Ultimately, your personal style should guide your choice. Do you lean towards bold colors or soft pastels? Are you a fan of intricate designs or do you prefer simplicity? Trust your instincts and choose a design that resonates with your personality.
6. Budget
Lastly, consider your budget. Manicures can range from affordable to high-end, especially if you’re going for intricate nail art. If you’re on a budget, look for DIY options or local nail salons that offer special deals. You can still achieve a fashionable look without breaking the bank!
Pro Tip: If you’re unsure, start with a classic butter yellow manicure. You can always add more designs or switch up your style as you get more comfortable with the color. This way, you can experiment while keeping it chic!
8. French Twist
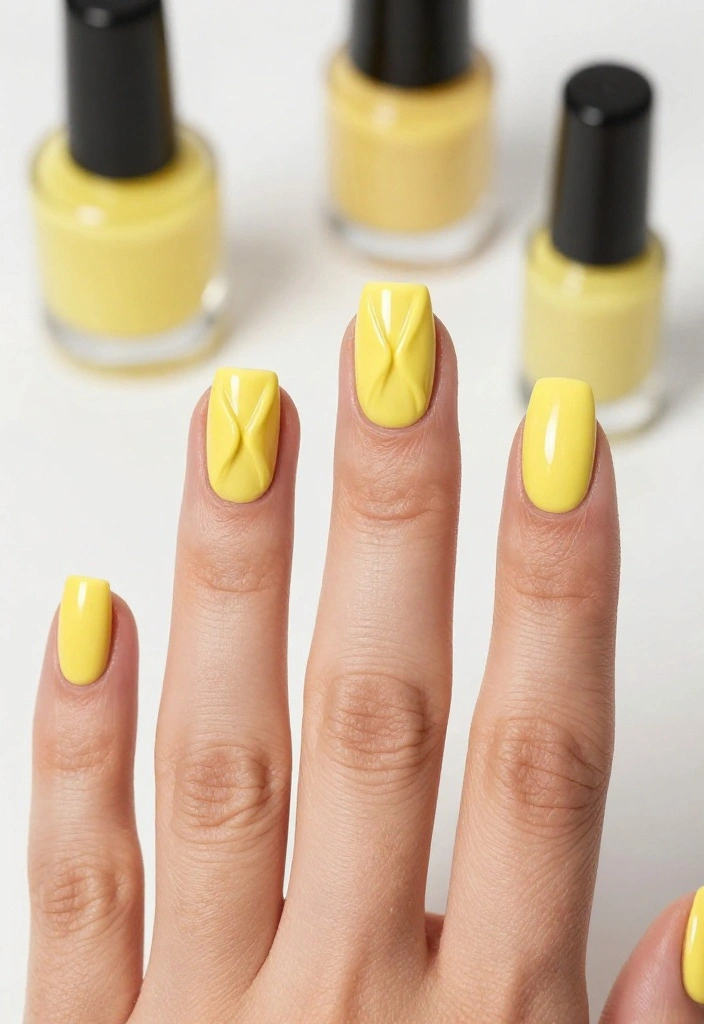
Put a fun spin on the classic French manicure with a butter yellow French twist! Instead of the traditional white tips, this design features cheerful butter yellow tips that feel both playful and chic. It’s versatile enough for everyday wear or special occasions.
Start with a clear or nude base coat, and once dried, apply the butter yellow polish to the tips of your nails using a thin brush or tape for a clean line. Precision is key, so take your time to ensure your tips are even and polished.
Add a tiny gem or two to the corners of the tips for a bit of sparkle and charm.
– Clear or nude nail polish
– Butter yellow nail polish
– Base coat
– Top coat
1. Prepare your nails with a base coat and apply clear or nude polish.
2. Once dry, paint the tips with butter yellow polish.
3. Finish with a top coat to protect your design.
9. Marble Effect (Don’t Miss This One!)
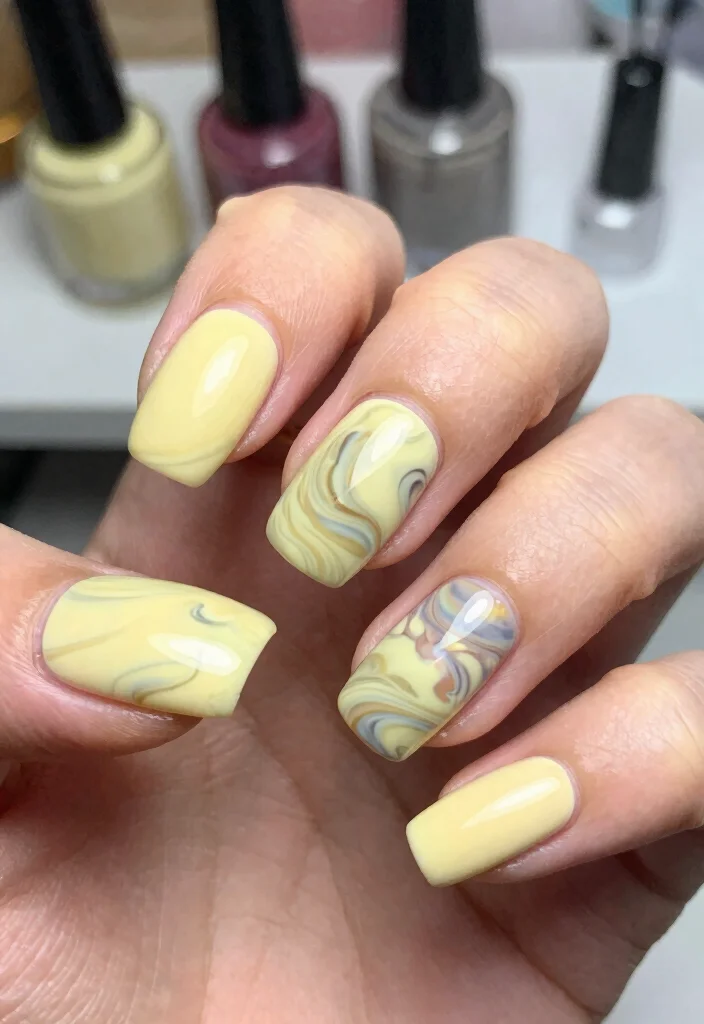
Elevate your manicure with a butter yellow marble effect that exudes sophistication and artistry. This trendy design is eye-catching and allows you to creatively express your unique style. The beautiful swirls of butter yellow combined with whites and hints of gold or silver create a luxurious finish that stands out.
To achieve this marble effect, start with a butter yellow base. While it’s still wet, add drops of white and any other colors you desire, then swirl them together using a toothpick or a small brush. Feel free to experiment with the amount of swirls and colors until you achieve your desired look!
Finish with a glossy top coat to enhance the shine of the marble effect.
– Butter yellow nail polish
– White nail polish
– Additional colors (optional)
– Base coat
– Top coat
1. Clean and apply a base coat to your nails.
2. Once dry, paint your nails with butter yellow polish.
3. While wet, use a toothpick to add drops of white and swirl with the butter yellow.
4. Finish with a top coat to seal your design.
10. Neon Butter Yellow
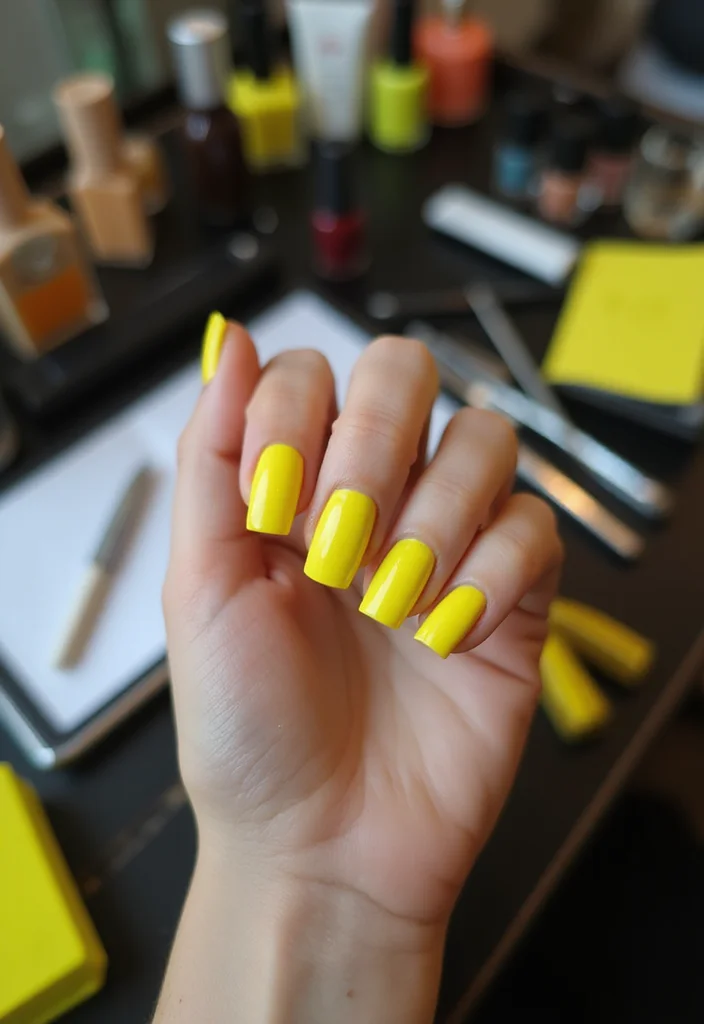
If you want to make a bold statement, go for a neon butter yellow! This vibrant twist on the classic butter yellow manicure adds an electrifying pop that’s perfect for summer festivals or night outings. It’s loud, fun, and sure to grab attention wherever you go.
Begin with a neon butter yellow nail polish for that striking color. Start with a good base coat for a smooth finish, then apply two coats of neon polish for a bold, solid look. This design is all about showcasing your confidence and self-expression.
Consider using a matte top coat for a trendy twist or layering with holographic glitter for an extra fun effect.
– Neon butter yellow nail polish
– Base coat
– Top coat (matte or glossy)
1. Prepare your nails with a base coat before applying the neon polish.
2. Apply two coats of neon butter yellow for full coverage.
3. Seal your design with a top coat, and you’re ready to shine!
Neon Butter Yellow
Editor’s Choice


11. Textured Matte
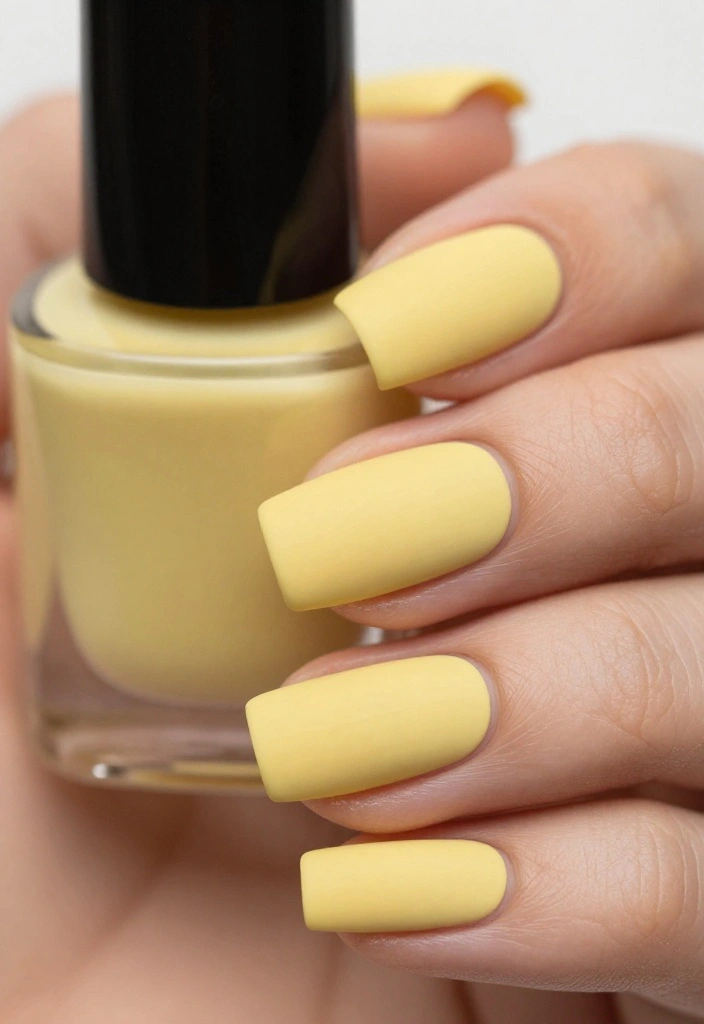
For a unique and stylish twist, try a textured matte butter yellow manicure. This design combines the soft, buttery hue with a matte finish, creating a sophisticated look that suits any occasion. The matte texture gives your nails a modern edge while showcasing the inviting color beautifully.
To achieve this look, start with a base coat, then apply two coats of butter yellow polish. Once dried, finish with a matte top coat for that chic, velvety finish. The matte effect not only looks stylish but also adds an interesting dimension to the bright yellow shade.
Consider adding a glossy accent nail for contrast and dimension in your design.
– Butter yellow nail polish
– Base coat
– Matte top coat
1. Clean and shape your nails, then apply the base coat.
2. Apply two coats of butter yellow polish and allow it to dry.
3. Finish with a matte top coat to seal your matte design.
12. Rainbow Accents
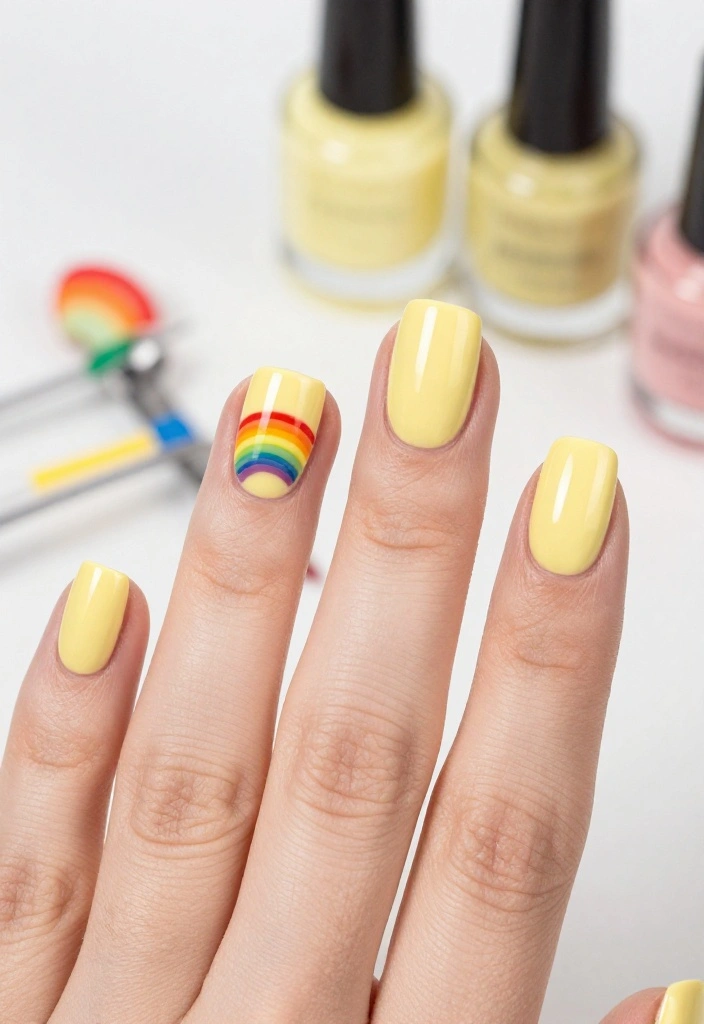
Add a playful splash of color to your butter yellow manicure with rainbow accents! This vibrant design is perfect for those who love to express their personality through their nails, creating a joyful and cheerful appearance.
Start with a butter yellow base coat and let it dry. Using a thin brush or nail art pen, create small rainbow designs or colorful stripes on accent nails. Bright colors like red, blue, green, and purple will create a fun contrast against the sunny yellow.
For an extra cute touch, consider adding tiny clouds or stars alongside the rainbows!
– Butter yellow nail polish
– Various colors for rainbow accents
– Base coat
– Top coat
1. Prepare your nails with a base coat followed by butter yellow polish.
2. Once dry, add rainbow designs using a thin brush or nail art pen.
3. Finish with a top coat to seal your colorful designs.
13. Tropical Vibes
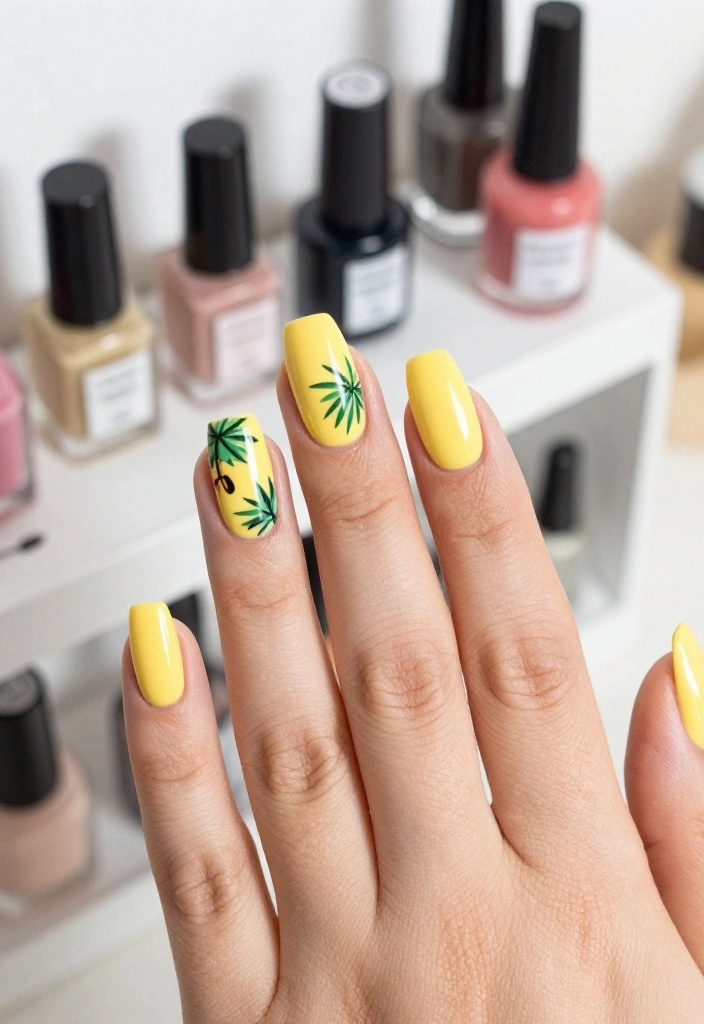
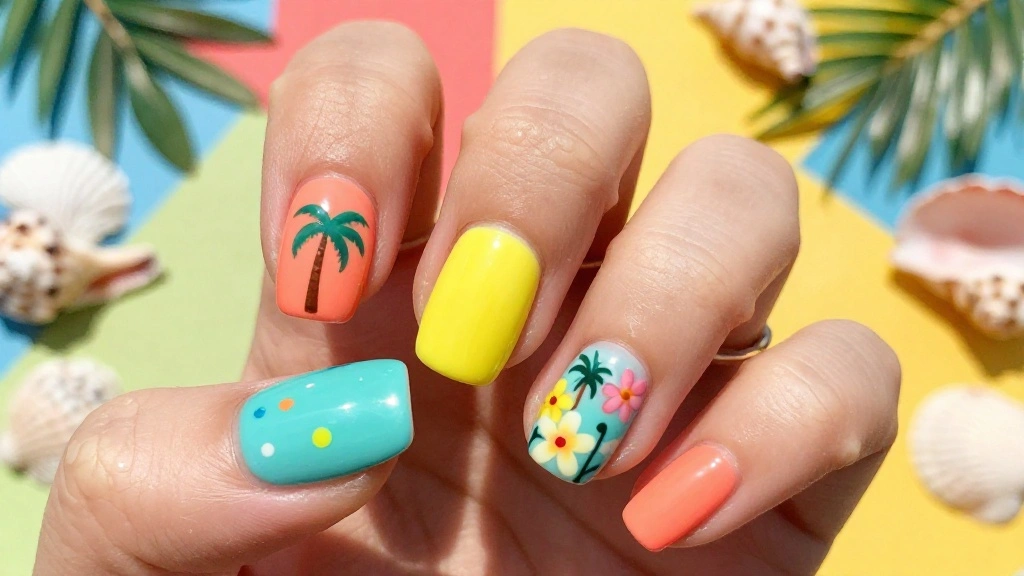
Bring a taste of the tropics to your fingertips with a butter yellow manicure inspired by summer vibes! This design is perfect for sunny days and evokes images of palm trees, beaches, and fruity delights. You can create tropical designs like palm leaves, fruits, or even cute flamingos to truly embrace the fun vibe.
Start with a butter yellow base and let it dry completely. Using fine brushes or nail art pens, craft your tropical designs in vibrant greens, pinks, and blues. This look is all about creativity and having a blast with your nail art!
If you’re short on time, consider using nail stickers for easier application.
– Butter yellow nail polish
– Additional colors for tropical designs (green, pink, etc.)
– Base coat
– Top coat
1. Clean your nails and apply a base coat, then butter yellow polish.
2. Once dry, use fine brushes to create your tropical designs.
3. Seal your designs with a top coat.
You Might Also Like
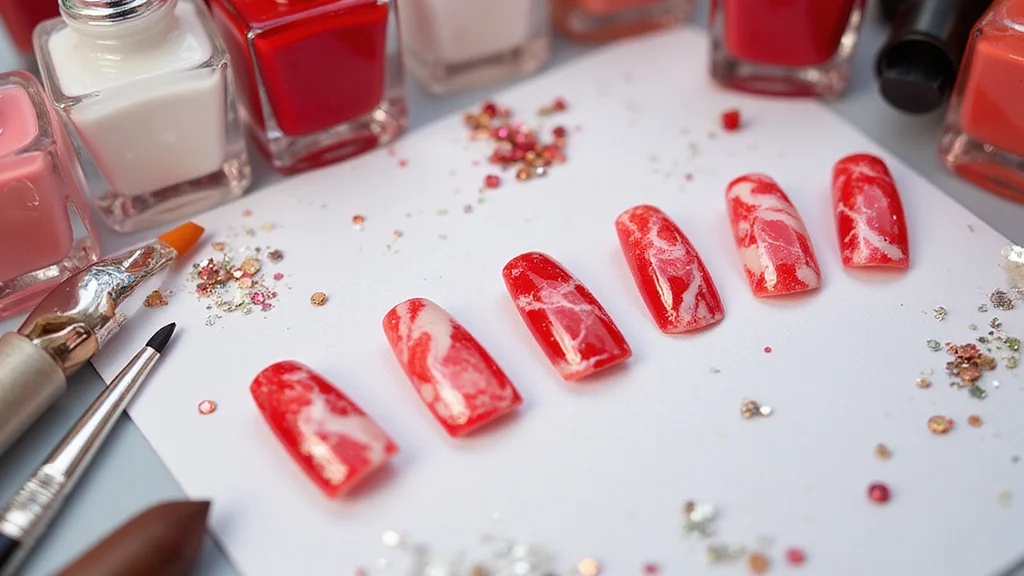
14. Artistic Brush Strokes
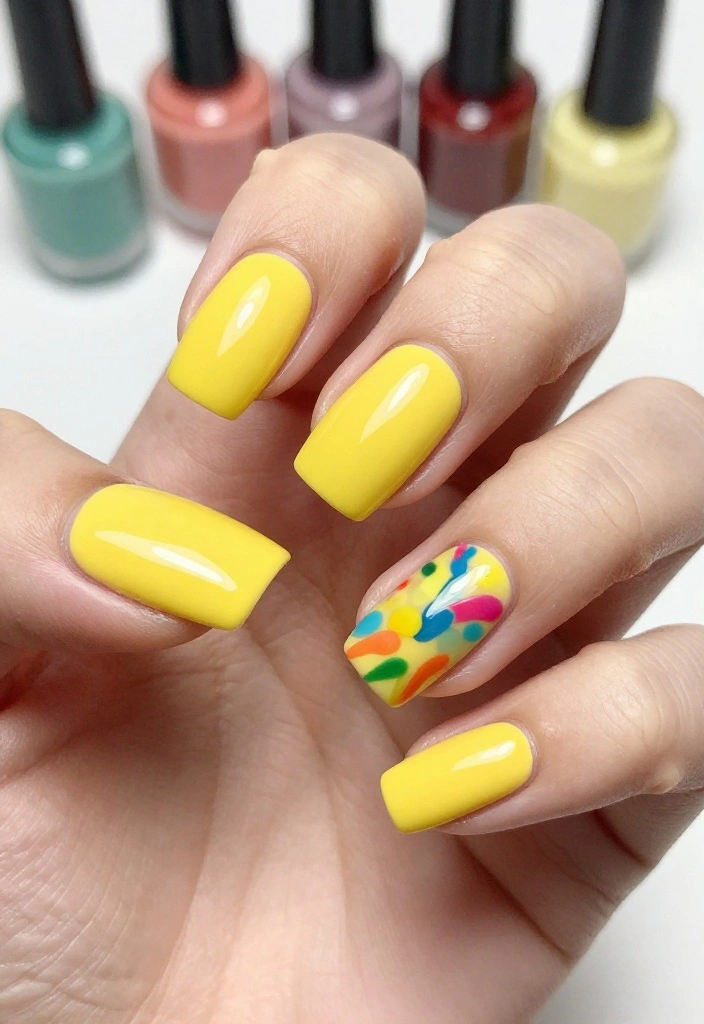
For the creatively inclined, an artistic brush strokes design on your butter yellow manicure is a fantastic option. This look brings a painterly effect to your nails, allowing for a beautiful blend of colors and textures that showcase your artistic side.
Start with butter yellow as your base and allow it to dry. Then, use a flat brush dipped in various colors, like pastels or bold shades, to create dynamic brush strokes across your nails. This design embraces freedom of expression, so let your creativity run wild!
For softer strokes, apply lighter pressure, and for vibrant effects, use brighter colors.
– Butter yellow nail polish
– Additional colors for brush strokes
– Base coat
– Top coat
1. Prepare nails with a base coat and butter yellow polish.
2. Once dry, use a flat brush dipped in your chosen colors to create artistic strokes.
3. Finish with a top coat for a polished look.
15. Marbleized Tips
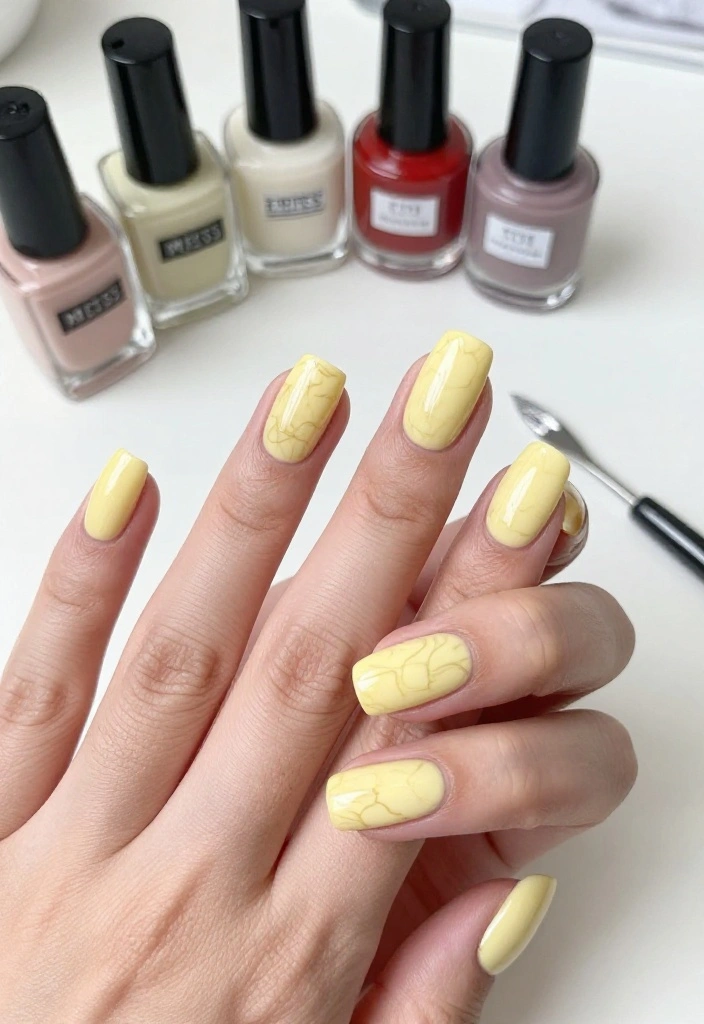
Combine the elegance of marble with the cheerful nature of butter yellow by creating marbleized tips on your manicure. This design offers a stylish twist on the classic French tip, making it visually interesting while remaining sophisticated.
Start with a butter yellow base coat. Use a toothpick or small brush to swirl in white (or another color) at the tips, creating a marble effect. This look is perfect for any occasion, blending fun and elegance effortlessly.
Practice on a nail wheel to perfect your technique before applying it to your nails for the best results.
– Butter yellow nail polish
– White (or other color) nail polish
– Base coat
– Top coat
1. Prepare your nails with a base coat, then apply butter yellow polish.
2. Once the polish is dry, use a toothpick to create swirls of white at the tips.
3. Seal your design with a top coat to keep it fresh.
16. Metallic Foil Accents
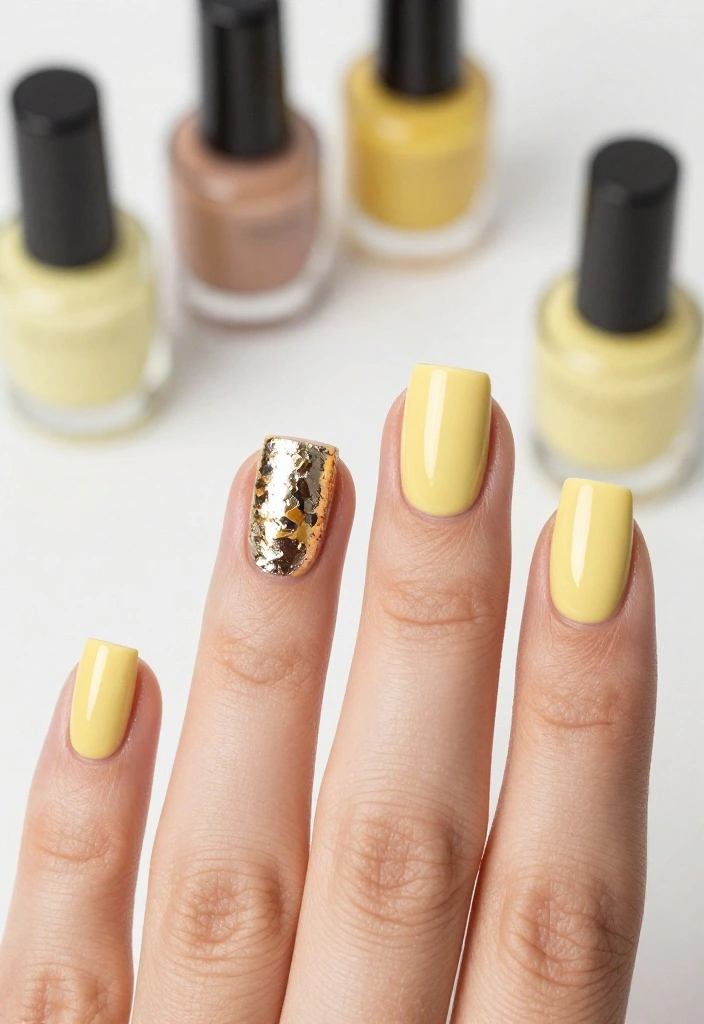
Transform your butter yellow manicure from simple to stunning with metallic foil accents. This design adds a luxurious touch that is both trendy and chic, perfect for upscale events or nights out.
Start by painting your nails with butter yellow as your base. Once dry, apply small pieces of metallic foil to desired areas on your nails using clear polish or nail glue. The shiny foil against the soft yellow creates a striking look that enhances your overall design.
Consider using gold or silver foils for an elegant finish, or mix in colorful pieces for a more playful vibe.
– Butter yellow nail polish
– Metallic foil
– Base coat
– Top coat
1. Clean and apply a base coat followed by the butter yellow polish.
2. Once dry, apply small pieces of metallic foil to your nails.
3. Seal with a top coat to lock in your beautiful design.
Fun fact: adding gold foil to a butter yellow manicure can boost shine by up to 40% under glossy lighting, making photos pop. This tiny touch turns a simple mani into couture in minutes.
Metallic Foil Accents
Editor’s Choice

17. Sunflower Inspiration
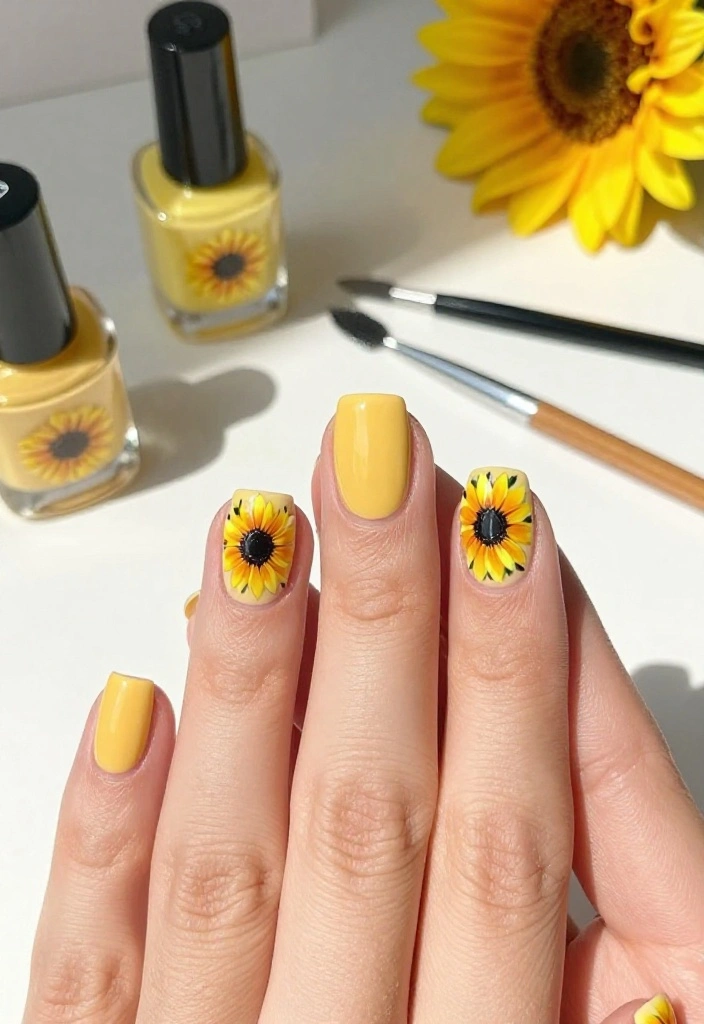
Let your butter yellow nails shine with sunflower inspiration! This design is perfect for nature lovers who want to bring a bit of summer into their style. The cheerful look will surely brighten your day and those around you.
Start with a butter yellow base coat, and once dry, use brown and green polish to create sunflower designs on your accent nails. This charming look can be dressed up or down, making it suitable for any occasion.
Use nail art pens for precision when crafting your flowers for a more detailed effect.
– Butter yellow nail polish
– Brown and green nail polish for sunflowers
– Base coat
– Top coat
1. Prepare your nails with a base coat and apply butter yellow polish.
2. Once dry, use brown and green polish to create sunflower designs on the accent nails.
3. Finish with a top coat to protect your designs.
Fun fact: People notice 2 sunflower accents on a butter yellow manicure in under 3 seconds. This tiny detail sparks smiles and makes any outfit feel sunnier.
Conclusion
Butter yellow manicures offer limitless possibilities to express your style! From classic and chic to bold and playful, there’s something for everyone. With these 17 ideas, you can easily find the perfect design for any occasion, whether it be a casual outing or a special event. Don’t be afraid to mix and match styles or get creative with your own unique designs!
Now, it’s time to grab your nail polish and start experimenting with these stunning butter yellow manicure ideas!
Note: We aim to provide accurate product links, but some may occasionally expire or become unavailable. If this happens, please search directly on Amazon for the product or a suitable alternative.
This post contains Amazon affiliate links, meaning we may earn a small commission if you purchase through our links, at no extra cost to you.
Frequently Asked Questions
What are the best butter yellow manicure ideas for a chic, fashionable look?
Butter yellow manicure offers sunny vibes with chic versatility. For a fashionable and chic look, try these ideas:
1) butter yellow with negative space at the base; 2) a butter yellow French tip with white tips; 3) a matte butter yellow finish with subtle gold foil accents; 4) a butter yellow gradient (ombre) fading into clear; 5) butter yellow with white or metallic geometric lines; 6) an accent nail in butter yellow with tiny rhinestones or delicate floral decals. Practical steps: prep your nails, apply base coat, paint two coats of butter yellow manicure, clean up the edges, then finish with a top coat (gloss) or a matte top coat for a different vibe. This keeps your look fashionable and easy to wear for any occasion.
How do I choose the right butter yellow shade for my skin tone?
Choosing a butter yellow manicure shade is all about undertones. For warm or neutral skin, go with creamy, golden-toned yellows that add warmth. For cool skin, pick a paler, milky butter yellow that won’t wash you out. Deeper skin tones can rock richer, amber-tinted butter yellows. Test on a nail swatch or patch in natural light and compare to your cuticle line. A handy tip is to choose a shade that sits softly beside your nail bed rather than blending in. In doubt, start with two thin coats on a small nail wheel and see how it sits in daylight. This keeps your look fashionable and chic.
What nail designs pair well with a butter yellow manicure for different occasions?
For work, keep it elegant with a glossy butter yellow base plus a clean white accent nail or a single thin gold line. For weddings, opt for a soft matte butter yellow with pearl accents or delicate gold foil. Date nights shine with a butter yellow base accented by subtle black stripes or floral decals. Summer parties look great with a glitter gradient starting at the tip, while everyday chic stays polished with minimalist lines or a tiny dot pattern. All of these pair nicely with butter yellow manicure and feel fashionable and chic across occasions.
How can I make my butter yellow manicure last longer without chipping?
Prepping nails is key: clean, shape, push back cuticles, and dehydrate the nail bed. Then apply a solid base coat, followed by two thin coats of butter yellow manicure, sealing with a durable top coat. Cap the free edge to lock in color, and reapply the top coat every 2–3 days. Avoid long exposure to hot water and harsh dishwashing; wear gloves for chores. If you’re using gel, cure under a UV/LED lamp and finish with a gel top coat for extra longevity. With these steps, your butter yellow manicure stays fresh and fashionable longer.
What tools and tips do I need to recreate the butter yellow manicure trend at home?
Essentials include: base coat, top coat, a dependable butter yellow manicure polish, a nail file and buffer, cuticle pusher, lint-free wipes, and nail cleanser. For designs, grab striping tape, a fine liner brush, a dotting tool, and optional gold foil or decals. Extras like rhinestones or floral decals can elevate the look. If you’re going long or want a gel finish, consider a UV/LED lamp. Steps: prep nails, apply base coat, paint two thin coats of butter yellow, clean up edges, add design with tape or decals, seal with top coat, and cure if using gel.
Related Topics
butter yellow manicure
nail fashion
chic nails
fashionable manicures
spring nails
minimalist nail art
easy nail designs
trendy colors
nail inspiration
beginner friendly
seasonal styles
occasional manicures