This post may contain affiliate links. We may earn a small commission at no extra cost to you. See our disclosure policy.
Staring at your reflection after getting that bold pixie cut, you might be wondering if you made the right choice. That initial moment of hair shock is completely normal – we’ve all been there! The good news is that learning how to style a pixie cut opens up a world of versatile looks that can take you from effortlessly chic mornings to glamorous evening events.
Your new short hair isn’t a limitation; it’s actually your ticket to experimenting with textures, volumes, and shapes you never thought possible. Whether you want to create tousled, bedhead waves for a casual weekend vibe or sleek, polished styles for the office, pixie cuts offer surprising flexibility once you master the right techniques and products.
Table of Contents
- Master the Art of Texturizing Your Pixie with Sea Salt Spray
- Create Volume at the Crown Using a Round Brush and Blow Dryer
- Tame Stubborn Cowlicks with Pomade and Strategic Finger Styling
- Q&A
- Wrapping Up
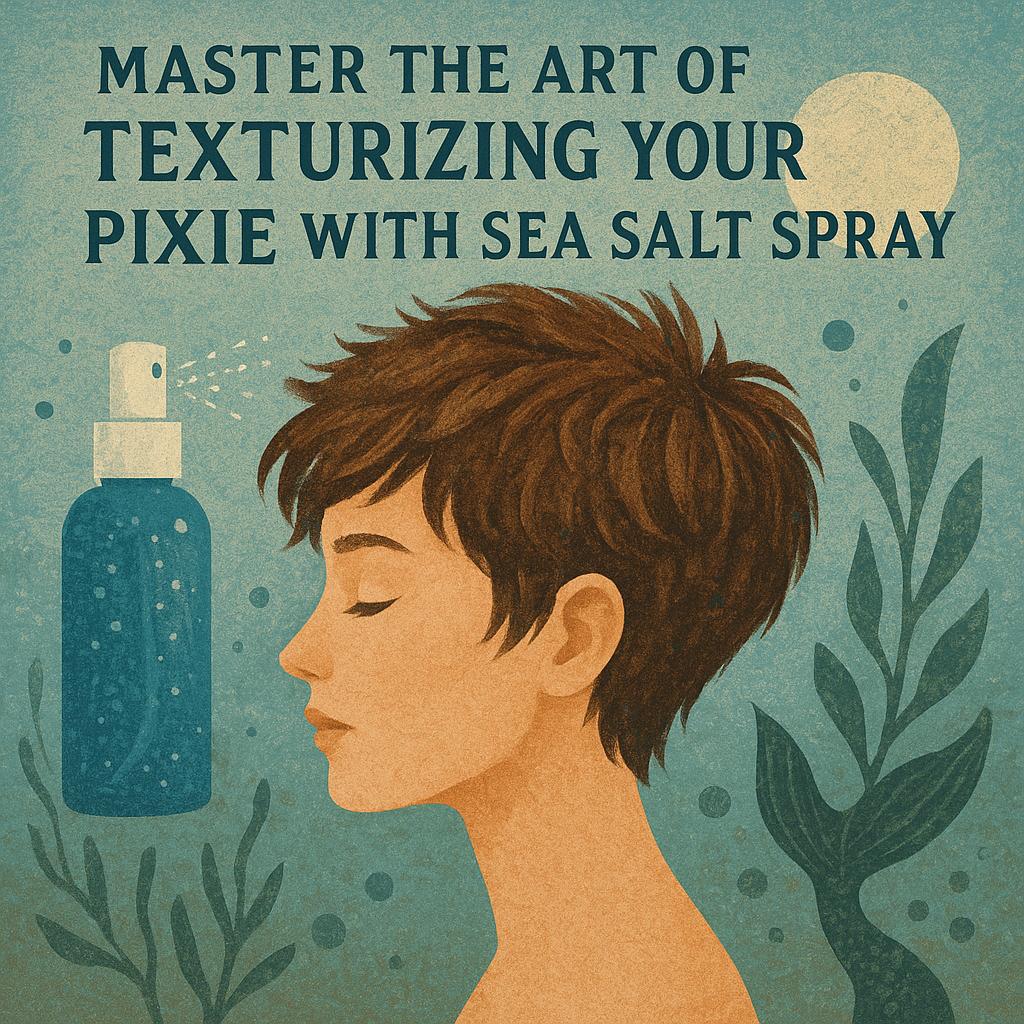
Master the Art of Texturizing Your Pixie with Sea Salt Spray
Sea salt spray is your secret weapon for creating that effortlessly tousled, beachy texture that makes pixie cuts look absolutely stunning. This miracle product works by enhancing your hair’s natural texture while adding volume and grip, giving your short strands the perfect amount of grit and movement. The salt particles create micro-texture on each strand, making fine hair appear thicker and giving coarse hair more definition and control.
The key to mastering sea salt spray lies in understanding your hair type and applying the product strategically. Start with slightly damp hair for maximum absorption, then scrunch the spray through your pixie from roots to tips. For extra oomph, flip your head upside down while scrunching to encourage natural volume at the crown. [PRODUCT LINK: Bumble and Bumble Surf Spray] and [PRODUCT LINK: Ouai Wave Spray] are cult favorites that deliver salon-quality results without the crunch.
| Hair Type | Application Method | Expected Result |
|---|---|---|
| Fine/Thin | Light misting on damp hair | Added thickness and grip |
| Medium/Normal | Even distribution throughout | Enhanced natural texture |
| Thick/Coarse | Section and spray generously | Tamed frizz with definition |
| Curly | Scrunch into wet curls | Defined, bouncy spirals |
Pro Tip: Mix a few drops of lightweight hair oil with your sea salt spray in your palms before applying to prevent over-drying and add extra shine to your textured pixie.

Create Volume at the Crown Using a Round Brush and Blow Dryer
Start with damp hair and apply a volumizing mousse from roots to mid-lengths, focusing heavily on the crown area. Choose a medium-sized round brush (1.5-2 inches) that fits comfortably under your pixie’s shorter layers. The key is to lift sections straight up from your scalp rather than brushing them back – this creates maximum height at the roots where you want the most volume.
Work in small sections, wrapping each piece around the brush and directing the blow dryer’s airflow down the hair shaft while pulling the brush upward. Hold each section for 10-15 seconds with the brush lifted high, then blast it with cool air to set the volume before releasing. This technique trains your hair to maintain lift even after styling.
| Hair Length | Round Brush Size | Best Technique |
|---|---|---|
| Very short pixie (1-2 inches) | Small (1 inch) | Quick lift and twist motions |
| Classic pixie (2-3 inches) | Medium (1.5-2 inches) | Full wrap with extended hold time |
| Long pixie (3-4 inches) | Large (2-2.5 inches) | Smooth wrapping with root focus |
- Use [PRODUCT LINK: volumizing mousse] for lightweight hold without heaviness
- Keep your blow dryer on medium heat to prevent damage to short strands
- Always finish with a cool shot to lock in volume and add shine
- Work against your natural growth pattern for maximum lift
Pro Tip: For pixie cuts with cowlicks at the crown, blow dry those stubborn areas first while your hair is still very damp – the extra moisture helps reset the growth pattern and makes volume easier to achieve.
Tame Stubborn Cowlicks with Pomade and Strategic Finger Styling
Cowlicks can be the bane of pixie cut styling, creating stubborn sections that stick up or refuse to lay flat. The key to conquering these rebellious areas lies in using the right amount of pomade and working with your hair’s natural growth patterns rather than against them. Start with slightly damp hair and warm a small amount of pomade between your palms before applying it directly to the cowlick area.
The secret weapon for cowlick control is strategic finger styling that redirects the hair’s natural direction. Use your fingertips to gently press and smooth the pomade-coated hair in the direction you want it to lay, then hold for 10-15 seconds to help set the style. For particularly stubborn areas, try the “spiral technique” – use your finger to create small circular motions that gradually train the hair into submission.
| Hair Type | Best Pomade Texture | Application Technique |
|---|---|---|
| Fine Hair | Light, water-based | Gentle pressing motions |
| Thick Hair | Medium-hold clay pomade | Firm smoothing with palm pressure |
| Curly Hair | Cream-based pomade | Scrunching and directional smoothing |
- Multiple cowlicks: Work on one section at a time, allowing each area to set before moving to the next
- Crown cowlicks: Use upward finger movements to blend the direction change seamlessly
- Hairline cowlicks: Apply [PRODUCT LINK: lightweight smoothing pomade] sparingly and use downward strokes to create a sleek finish
- Persistent problem areas: Try [PRODUCT LINK: strong-hold styling paste] for extra control without weighing down your pixie cut
Q&A
Frequently Asked Questions
How do I style a pixie cut for everyday wear?
Start with slightly damp hair and apply a lightweight styling cream for texture. Use your fingers to tousle and shape the hair forward and to the sides for a natural, effortless look. A small amount of texturizing spray can add volume and hold without making your hair feel stiff.
What products work best for styling short pixie hair?
Lightweight pomades, texturizing pastes, and sea salt sprays are perfect for pixie cuts. Avoid heavy creams or gels that can weigh down short hair and make it look greasy. A good heat protectant is essential if you plan to use styling tools regularly.
Can I style a pixie cut without heat tools?
Absolutely! Air-drying with the right products often gives the best results for pixie cuts. Apply a volumizing mousse to damp hair, scrunch gently with your hands, and let it dry naturally. You can also try sleeping with small pin curls for added texture and volume.
How do I add volume to my flat pixie cut?
Use a root-lifting spray on damp hair and blow-dry with your head upside down using a round brush. Focus on lifting the hair at the crown and creating height at the roots. Dry shampoo can also add instant volume and texture to day-old hair.
What’s the best way to style a pixie cut for a night out?
Create a sleek, polished look by applying a smoothing serum to damp hair and blow-drying with a paddle brush. Add definition with a small amount of pomade, slicking the sides back or creating a deep side part. Finish with a light-hold hairspray for lasting shine and structure.
Wrapping Up
With the right techniques and products, styling a pixie cut can be both effortless and endlessly versatile. Whether you’re going for sleek and polished or tousled and textured, these styling methods will help you make the most of your chic short cut.
So grab your favorite styling products and give these looks a try – your pixie cut is about to become your new favorite accessory! Pin this for later so you’ll always have fresh styling inspiration at your fingertips.
Loved these tips? Save this post to your Pinterest hair board and share it with a friend who needs a hair refresh!